
Written by: Allie Beauchesne
While photography is our bread and butter (pun totally intended) here at Julee Ho Media, we love offering a more diverse variety of services to our clients. This includes recipe videos, which is a logical “next step” for so many professional food photographers. However, shooting video is definitely more involved than photos, and without preparation can result in frustration. As always, we’re here to help! Allow us to break down 5 easy tips to get you on your way to directing your first recipe video. Action!
1. Considering your Camera(s)

When you think of recipe videos, many people think of the overhead-style, “hands in pans” type of videos popularized by sites like Tasty. The overhead angle works well for a reason – it’s easy to see what is being done, can be achieved with a single camera and a single person (that’s you!) making the recipe. We achieve the overhead angle for video shooting with a camera mounted on a C stand, or a tripod that can be adjusted accordingly, over our shooting surface. We review our cameras, c-stand, and more gear of choice in this previous gear blog post!
If you have more than one camera, though, it’s definitely worthwhile to add a second angle to your video shooting. We like a camera on a tripod getting a more close up, 45-degree angle of the same actions. This is infinitely helpful when editing – sometimes the overhead angle isn’t the best to demonstrate what’s going on, or you have a few moments where the camera is shaky, etc.
Having a second camera and set of footage to alternate between ensures you can always illustrate your recipe in the best way possible, from start to finish. Whether you have one or two cameras, though, the key is to make sure whatever you are using is stable. Video footage that is shaky never looks good, and hand-held video shooting almost always guarantees jerky movements. Furthermore, if you’re holding your camera, you don’t have the free hands to execute your recipe without an assistant!
Once you have your camera(s) placed where you want them, you’ll want to make sure their settings are optimal for video, which is much different than photos. There’s quite a few things to consider when programming your camera’s settings for video shooting – we like this video from The Bite Shot to break down settings (and the “why” behind them) for video shooting.
Bonus pro tip! If using two cameras, make sure the settings are aligned, AND your cameras’ internal clocks are both on time and synced, which will make editing easier when the footage is lined up.
2. Lighting and Consistency
While you’re programming your cameras, you’ve undoubtedly looked at the light in your scene. For video, it’s important to ensure that the light remains consistent throughout the duration of filming – we don’t want it going from super bright to dark and shadow-y from frame to frame. If your recipe is quick enough, diffused natural light from a window can suffice – but we like to keep things consistently bright (and be able to shoot at any hour!) by using continuous LED lights. To keep the scene evenly lit, we use two Godox LED lights (like this) lit from the side. This allows us to stand behind the scene and make the recipe, without ever worrying about stepping in front of the light source and causing a change in lighting conditions.
3. The Three Rs – Readiness, Recipe, Ramekins
Once you’re all set up on the technical side, it’s time to prep yourself for success for the actual recipe filming. We recommend starting with something relatively simple and that you’ve made before for this first foray into video production. And before you hit record, make sure you have your three R’s in place – readiness, recipe, ramekins.
Readiness
You should be familiar with your recipe, as well as, what is in frame for your video. This will make placing things easier and moving from one step to the next a lot more seamless. You can always speed up or cut clips of dead air while editing, so try not to feel rushed or flustered while filming. You want your actions to be deliberate and in order. Speaking of order…

Recipe
You should have your recipe pulled up, printed out, or 1000% committed to memory before filming. This will ensure you demonstrate the recipe in the same order as its intended. You should also have all ingredients organized and pre-measured, leading us to…
Ramekins
When getting your ingredients organized, make sure you pre-measure all ingredients and place them in smaller containers/measuring cups/camera-ready ramekins. It helps to have a variety of sizes of prep bowls and ramekins in your arsenal, and this step will ensure you are not highlighting name brands of secondary ingredients (usually not preferable for clients). This will also give a consistent look and feel to your video through props.
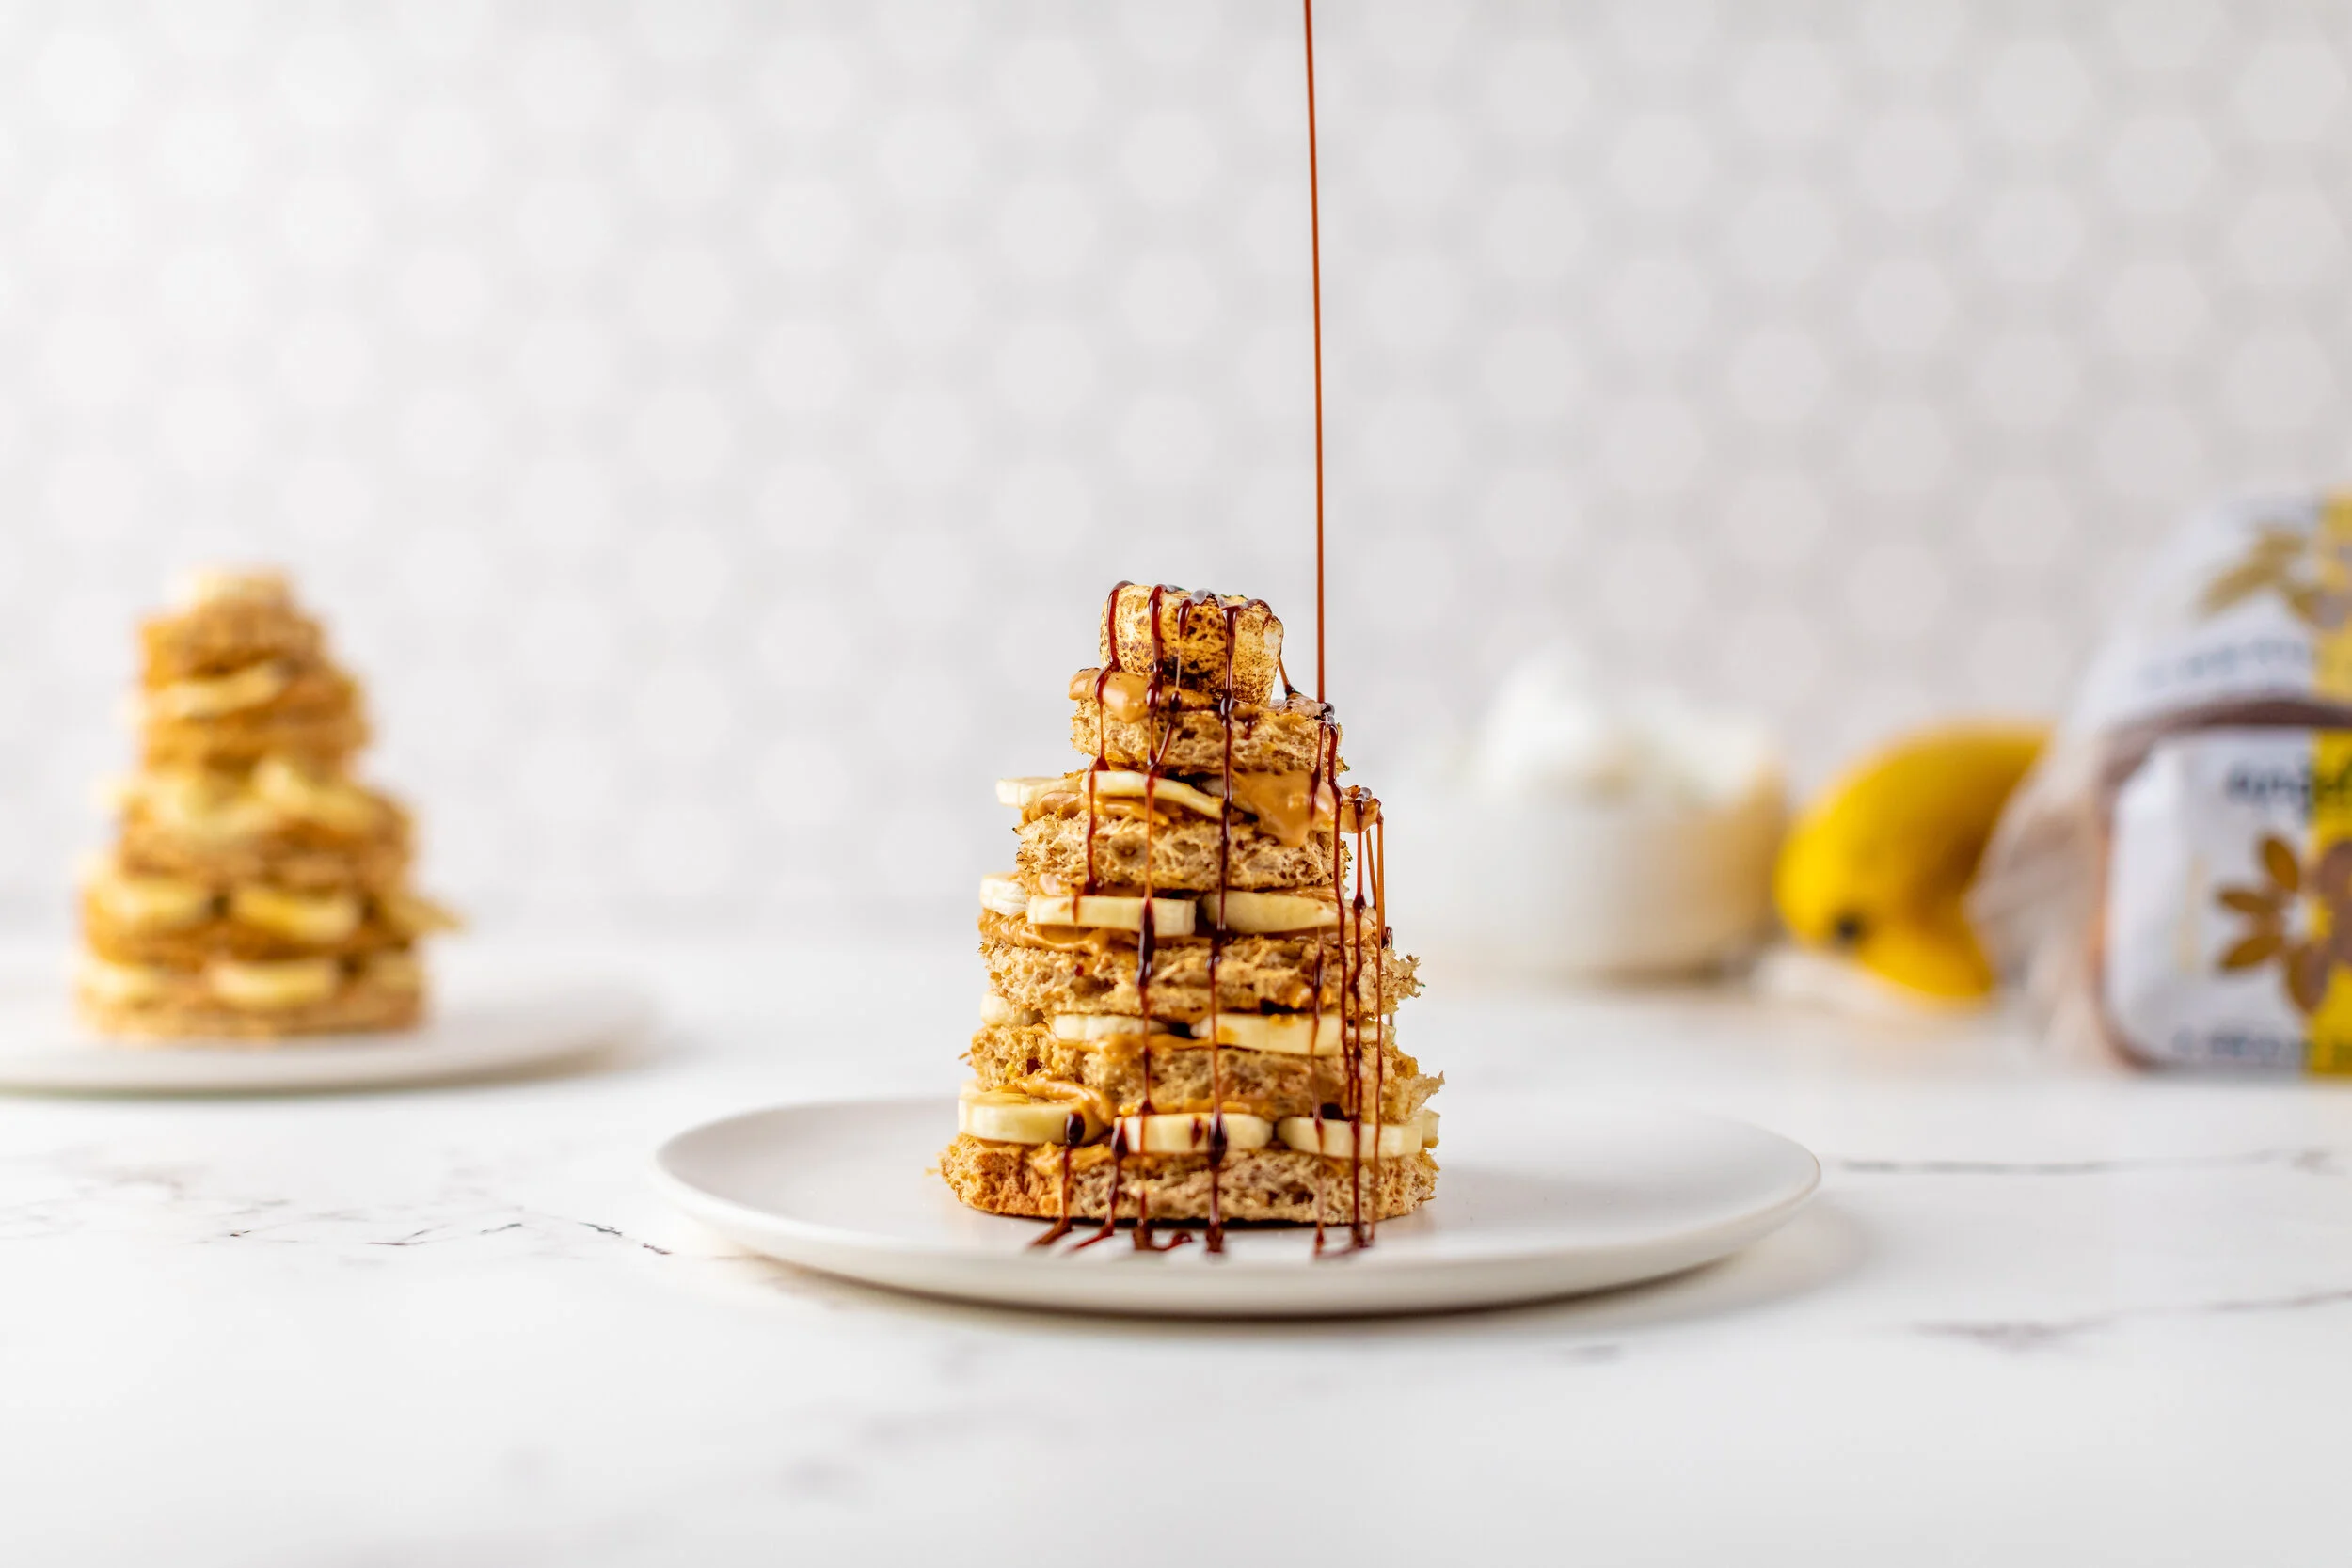
4. Movement
Repeat after us: always-be-moving! A video clip with no movement feels stagnant and less engaging than that with deliberate movement. This movement, however, can be any number of things; ingredients being combined in a bowl, the camera panning over the finished dish, a drip of sauce slowly moving down the meal, the pull of cheese from two sandwich halves – the list goes on. The key is to consider these movements while filming and editing your video. For our close-up camera, we use a Manfrotto video head on our tripod, which allows us to pan over a scene in a steady, fluid motion. As mentioned before, we don’t want shaky or jerky movements, but rather slow and controlled ones that are not jarring to the viewer. If you have a video assistant, have them occasionally pan over the scene with your detail camera while you are assembling, plating, or trying the finished dish.
5. Considering Clips
Much like considering movement before and during filming, you’ll also want to be cognizant of specific clips to help tell the story of your video. Like anything else, you should have a beginning, middle and end for your recipe video. Usually, the beginning should include an introduction to the recipe, including maybe a clip of the finished product. If you are creating the video for a client, it’s also smart to carefully introduce the “hero” product you’re using in the recipe (sliding the product in to frame, having the camera pan to or focus on the product, etc.) The middle of your video, of course, will be the making of the recipe. And the end should always consist of the finished product, but remember the movement we just discussed – some options are the dish being plated, someone taking a bite off camera, or some finishing touches being administered – like a drizzle of sauce or a sprinkle of seasoning. All of this will help create a really engaging video from start to finish.
6. Editing
Once you have all of the footage filmed for your recipe video, it’s time to edit. Pull all of the relevant clips into a video editing software such as Adobe Premiere Pro. Video editing is a fairly easy but also a meticulous and sometimes tedious process. Here are the tools/actions you’ll be performing most often:
Color adjustments: Making changes to the exposure, saturation, sharpness, etc. to align to the look and feel you want to accomplish in the video.
Splitting and cutting clips: This and the next point are key to any good recipe video – finding the balance between showing just enough of a clip to get the message across for each recipe step without having the video feel dragged or rushed. That said, you’re going to want to split up your clips and delete any dead space or unnecessary details in your recordings.
Speeding up / slowing down: You’ll likely be doing a lot more speeding up than you do slowing down. The idea is to have just enough time on screen to demonstrate the step in the recipe and/or have the viewer be able to read the text on screen. Speaking of text..
Text overlay: You’ll likely want to add text to your screen to display the steps in the recipe. Avoid putting full sentences and omit any unnecessary words. For example, instead of “Add three tablespoons of lemon juice to the bowl,” just put “Add 3 Tbsp lemon juice.” Additionally, if there are things that are easily comprehensible from viewing the footage on-screen, you likely don’t need to describe it in text.
Logo overlay: If you’re producing the video for your company, the company you work for, or a commercial client, you will likely want to overlay the logo at the beginning and/or end of the video, along with a call-to-action at the end to detail where folks can find more information about your company or products. E.g., “For more recipes, go to juleeho.com.”
Background music: Fun background music can do a lot to spruce up a video and add more entertainment value. Resources like YouTube’s Audio Library can be a great source for free music (make sure to filter by “Attribution not required” unless you’re okay with giving credit to the artist in the video).
Transitions: The average recipe video doesn’t require too many robust transitions. At the most, simple cross-fade transitions will do. And, in many cases, no transitions may be needed at all!
And that’s it! You’re off to the races with your very first recipe video. If you’re still slightly intimidated, trust us – it is not nearly as difficult as it sounds. Especially for those of you who are already skilled in food styling and photography, you already have the foundational skills to tackle recipe videos. The jump from photography to video isn’t a huge one – it just takes a little bit of practice!
Julee Ho Media is a boutique photography company specializing in CPG, food and beverage brands. Click here to get a quote and discover how we can help elevate your brand.


Want more content like this? Subscribe to our monthly Food Marketing Newsletter!
More resources: